TNT SIM Registration Philippines 2026 – Register Your TNT SIM Online
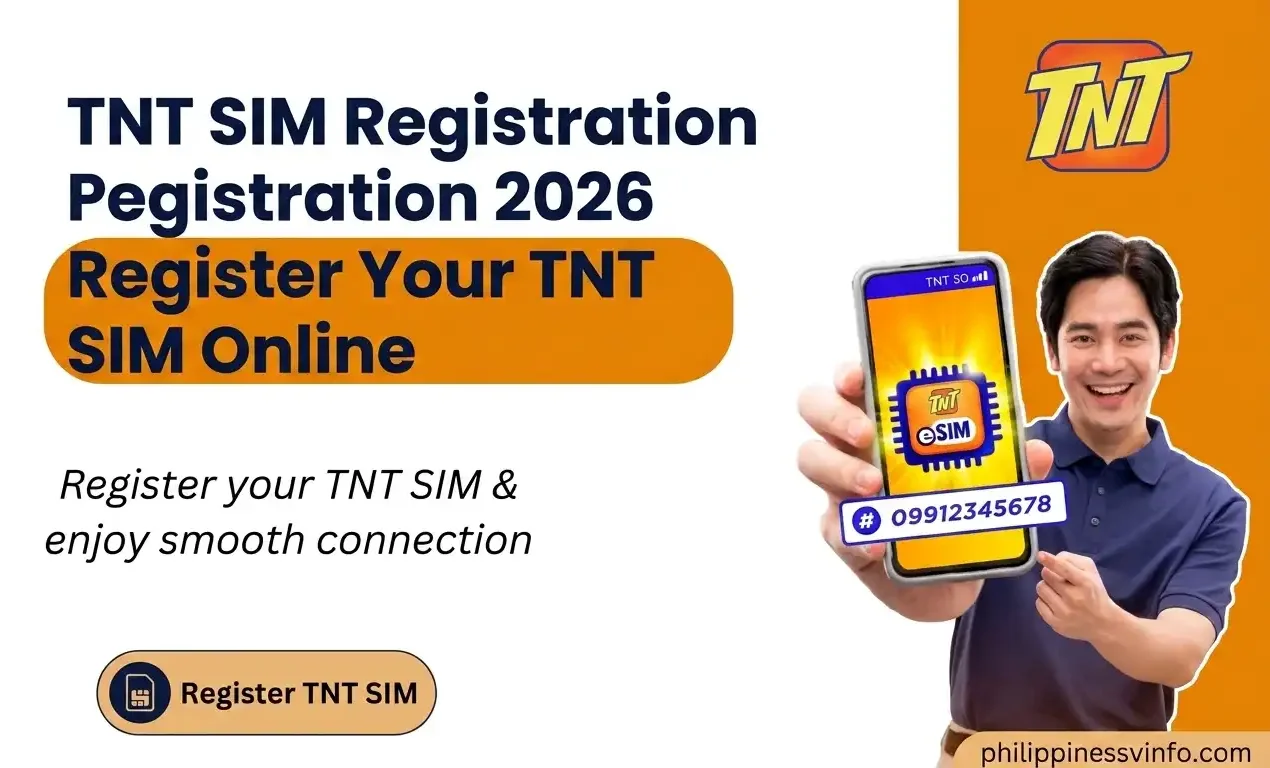
TNT SIM Registration 2026 is a mandatory requirement for all Talk ‘N Text (TNT) subscribers in the Philippines under the SIM Registration Act (Republic Act No. 11934). Whether you are a new or existing prepaid or postpaid user, registering your TNT SIM is essential to keep your mobile number active and continue enjoying uninterrupted access to calls, text messages, mobile data, e-wallet verification, online banking, and other digital services. Across the Philippines, failure to complete the registration process may result in permanent SIM deactivation, preventing you from using your mobile number or accessing accounts linked to it.
TNT SIM Registration not only fulfils a legal requirement but also strengthens your protection against identity theft, phishing attempts, spam messages, and other forms of mobile fraud. By linking every SIM card to a verified identity, the registration system helps create a safer and more secure digital environment for mobile users throughout the Philippines.
Register Your TNT SIM Card Online
Under the Philippine SIM Registration Act, every mobile user is required to register their SIM card to keep it active and compliant with government regulations. SIM registration strengthens user protection by reducing identity theft, online scams, spam messages, and other forms of mobile fraud. Whether you’re activating a brand-new TNT SIM or registering an existing one, you can complete the process conveniently through the official online registration portal, the Smart GigaLife App, or by visiting any authorised Smart Store or service centre. Visit Homepage
How to Register TNT SIM
The fastest and most convenient way to register your TNT SIM is by using the official Smart SIM Registration Portal. You only need a stable internet connection, your TNT mobile number, a valid government-issued ID, and a device with a camera.
Step 1: Visit the Official TNT SIM Registration Portal
Open your preferred web browser and access the official TNT/Smart SIM Registration portal. You may also scan the QR code provided on your SIM package or promotional materials to open the registration page directly.

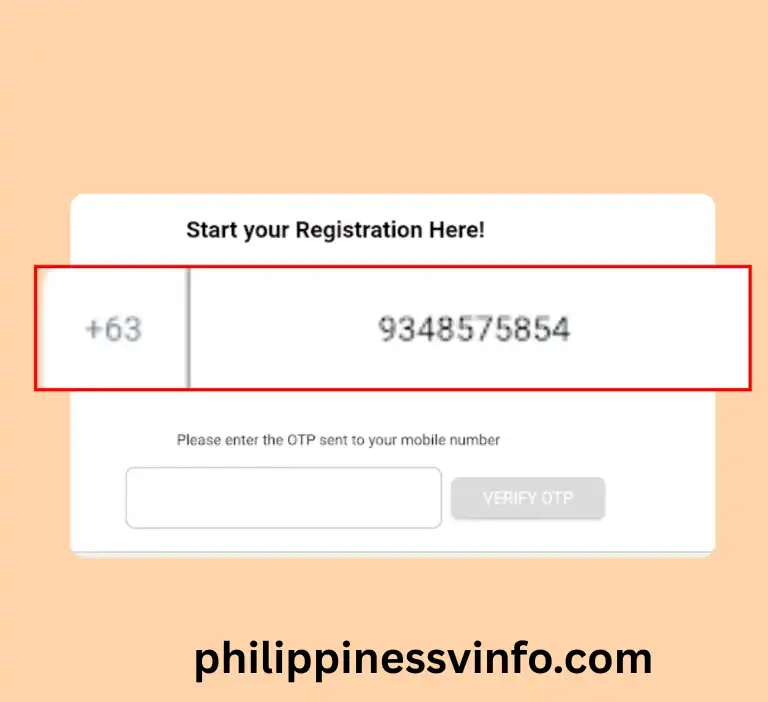
Step 2: Enter Your TNT Mobile Number
Enter your active TNT mobile number in the registration field. Type the number starting with 9 only, without adding the country code +63 or the leading 0. Make sure the number is correct, as it will be used to send the One-Time Password (OTP) required to continue your TNT SIM Registration.
Example:
- 917XXXXXXX
Step 3: Accept the Terms and Conditions
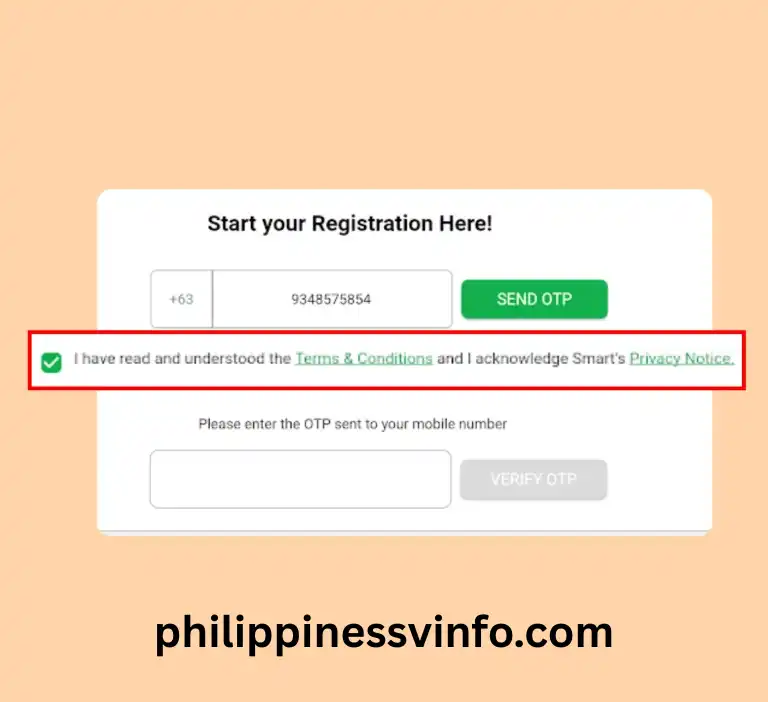
Carefully read the Terms and Conditions before continuing. Tick the confirmation checkbox to indicate that you agree with the registration requirements.
After that, click Send OTP.
Step 4: Verify the One-Time Password (OTP)
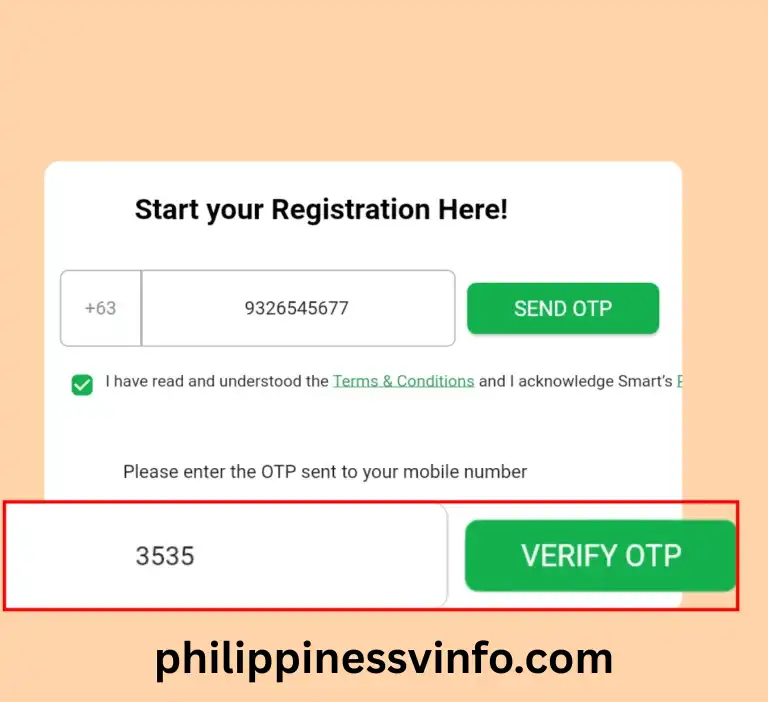
A verification code will be sent to your TNT mobile number.
Step 5: Complete the Customer Information Form
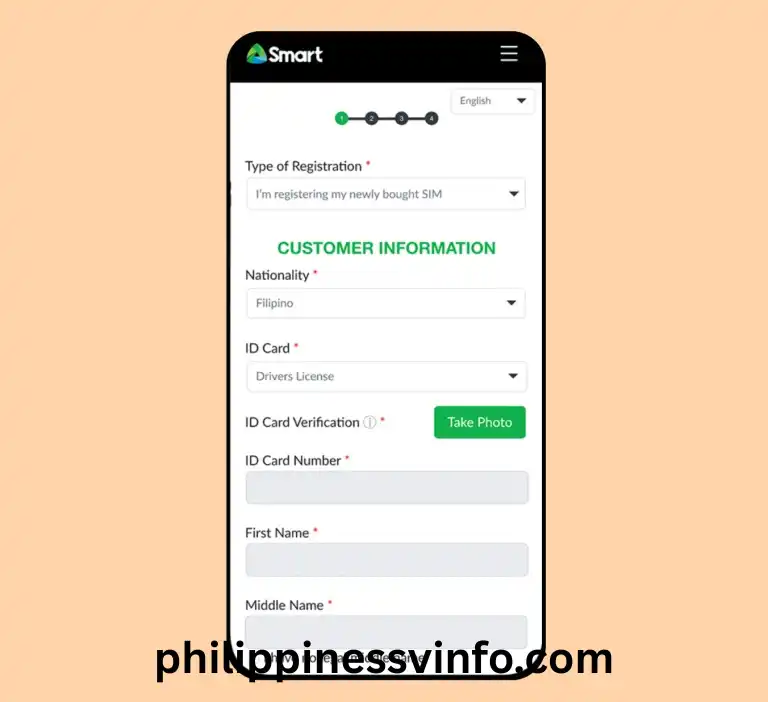
The registration portal will display a customer information form that must be completed accurately.
First, choose the appropriate registration type, such as:
Then select your nationality from the available list. Filipino users should simply choose Philippines.
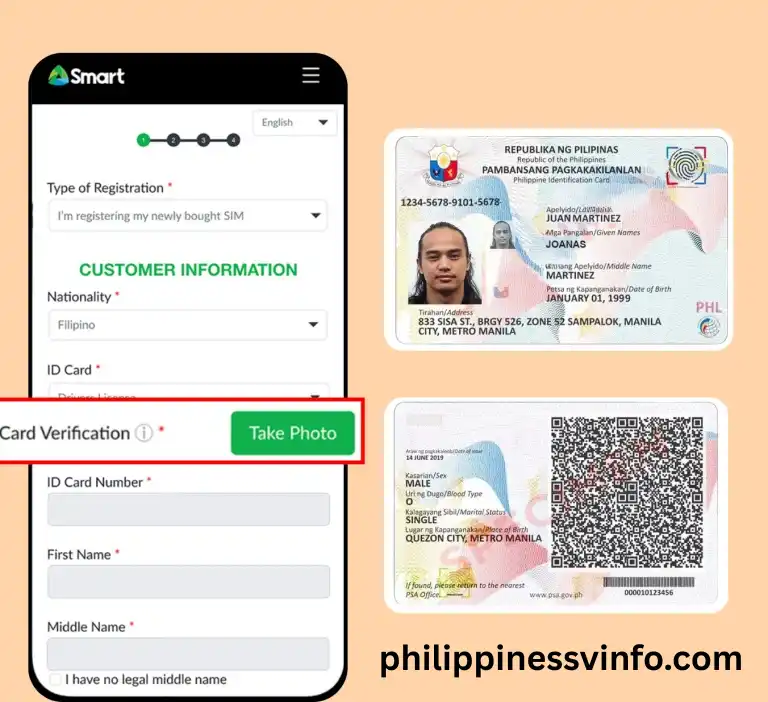
Step 6: Upload a Valid Government-Issued ID
Identity verification is one of the most important parts of the registration process.
Upload clear images showing both the front and back of your valid ID.
To avoid rejection:
Step 7: Complete Selfie Verification
After uploading your ID, the system will request a live selfie.
Position your face within the guide displayed on your screen and ensure:

Step 8: Provide Your Personal Information
Enter all required personal details, including:
Depending on the type of ID submitted, some information may automatically appear on the form. Review every detail carefully before moving forward.

Step 9: Review and Submit Your Registration
Before submitting your application, review every piece of information shown on the confirmation page.
After confirming that all details are correct:
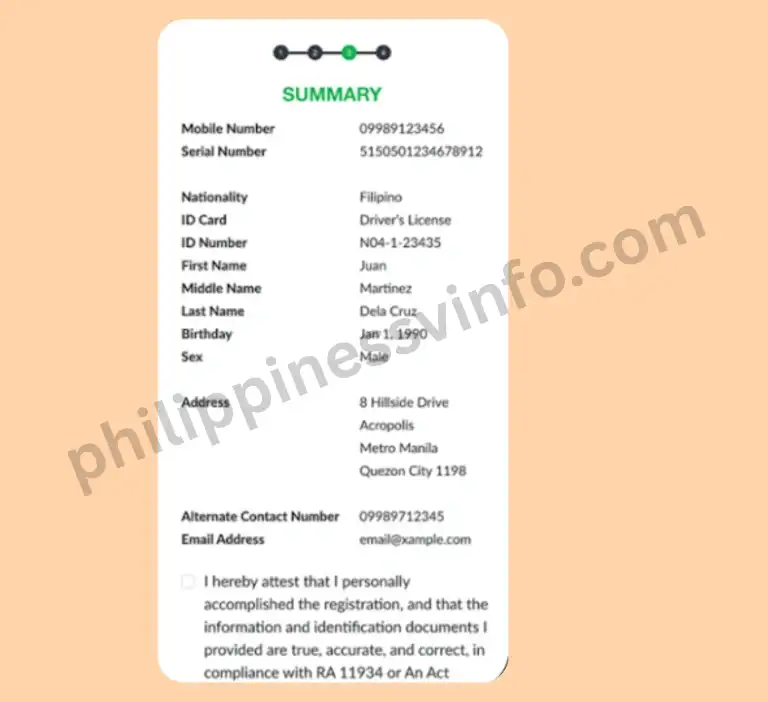
If everything has been completed successfully, a confirmation screen will appear displaying a congratulatory message indicating that your TNT SIM has been successfully registered.
TNT SIM Registration for Government Agencies and Private Organisations
Government offices, businesses, and registered organisations can also register your SIM cards for official use. Although the registration process is similar to that of individual subscribers, organisations are required to submit additional documents to confirm their legal status and authorise the person completing the registration.
Required Documents for Government Agencies
Government institutions should prepare the following documents:
Required Documents for Private Companies and Corporations
Private organisations and corporations must provide documents proving their legal registration and authorisation.
These include:
Preparing these documents before starting the registration process helps ensure faster verification and reduces the chances of delays or rejected applications.
How to Check Your TNT SIM Registration Status
After submitting your TNT online SIM registration, it’s a good idea to verify whether your registration has been successfully processed. Smart provides several convenient ways to check the status of your SIM registration, whether you prefer using the online portal, the Smart App, or visiting a Smart Store.
1: Check Your Registration Status Through the Smart Portal
The online registration portal is the quickest way to verify your TNT SIM registration.
Follow these steps:
- Visit the official TNT SIM Registration Portal.
- Enter your 11-digit TNT mobile number.
- Request and enter the One-Time Password (OTP) sent to your phone.
- Once your number is verified, your current TNT registration SIM status will be displayed on the screen.
If your registration has been approved, you will receive a confirmation message indicating that your SIM is successfully registered.
2: Verify Your Registration Using the Smart App
You can also check your registration status directly from the Smart App.
Steps to follow:
- Open the Smart App on your smartphone.
- Sign in using your Smart or TNT account credentials.
- Navigate to your account dashboard.
- Your registered mobile number and SIM registration status will be displayed within your account information.
This method is convenient for users who regularly manage their TNT account through the app.
3: Visit a Smart Store
If you are unable to check your status online, you can visit any authorised Smart Store for assistance.
Before visiting, make sure to bring:
A Smart representative will verify your identity and confirm whether your SIM has been successfully registered.
How to Activate Your TNT SIM Card After Registration
Once your TNT SIM registration has been successfully completed and approved, you can activate your SIM to begin using voice calls, SMS, and mobile data services. Follow the steps below to ensure your SIM is activated correctly.
Step 1: Insert Your Registered TNT SIM
Insert your registered TNT SIM card into your mobile phone, then switch on the device. Make sure the SIM is properly seated in the SIM tray before powering on your phone.
Step 2: Connect to the Smart Network
Enable your phone’s mobile network or mobile data and wait a few moments for your device to detect and connect to the Smart/TNT network. A stable network signal is required to complete the activation process.
Step 3: Wait for the Activation Confirmation
After your SIM has been activated, you will receive a welcome SMS from TNT or Smart confirming that your mobile number is now active. Once you receive this message, you can start making calls, sending text messages, and accessing mobile data services.
Step 4: Verify Activation Using *123#
You can confirm that your SIM is active by dialling *123# on your phone.
Follow these steps:
If your account information or prepaid balance is displayed, your TNT SIM has been activated successfully.
Step 5: Confirm Activation by SMS
You can also verify your SIM activation by sending the following text message:
?15001
If your TNT SIM is active, you will receive a confirmation SMS indicating that your mobile number has been successfully activated and is ready to use.
Acceptable Valid IDs for SIM Registration
To complete your SIM registration successfully, you must provide one valid government-issued identification document. Make sure the ID is clear, unexpired, and matches the personal information you enter during the registration process.
The following IDs are generally accepted for SIM registration in the Philippines:
TNT SIM Registration Requirements
Before starting your SIM registration, make sure you have all the necessary documents and personal information ready. The requirements vary depending on whether you are a Philippine citizen, a minor, a business representative, or a foreign national. Preparing these documents in advance will help you complete the registration process smoothly and avoid unnecessary delays.
Requirements for Philippine Citizens
Filipino subscribers must provide a valid government-issued ID together with their personal information during the registration process.
Required Documents and Information
Requirements for Minors
Minors are allowed to register a TNT SIM through their parent or legal guardian. The guardian is responsible for completing the registration and providing the required supporting documents.
Required Documents
Requirements for Companies and Business Organisations
Businesses, corporations, and registered organisations can register TNT SIM portal for official use by submitting documents that verify the company’s legal status and authorise the designated representative.
Required Documents
Requirements for Foreign Nationals
Foreign visitors and residents in the Philippines must provide additional travel and identification documents when registering a TNT SIM.
Required Documents
Preparing clear copies of your documents and ensuring that all personal information matches your identification records will help speed up the verification process.
Benefits of TNT SIM Registration 2026
| Benefit | Description |
|---|---|
| Keeps Your SIM Active | Ensures your TNT SIM remains active, allowing uninterrupted calls, SMS, and mobile data services. |
| Protects Against Scams | Reduces the risk of phishing, spam messages, identity theft, and other mobile fraud by linking your SIM to a verified identity. |
| Legal Compliance | Meets the requirements of the Philippine SIM Registration Act (Republic Act No. 11934) and keeps your mobile number compliant with government regulations. |
| Secure OTP Verification | Enables you to receive One-Time Passwords (OTPs) securely for online banking, e-wallets, government services, and other digital platforms. |
| Faster Account Recovery | Makes SIM replacement, account verification, and customer support requests quicker and more secure. |
| Uninterrupted TNT Services | Continue enjoying voice calls, text messaging, mobile data, and TNT promos without service interruptions. |
| Enhanced Account Security | Helps verify ownership of your mobile number if your SIM is lost, stolen, or needs to be replaced. |
| Access to Exclusive Promos | Registered subscribers may qualify for selected TNT rewards, special offers, and promotional packages. |
| Simplified Identity Verification | Speeds up future account-related transactions by using your verified registration details. |
| Free and Convenient Registration | The registration process is completely free and can be completed online through the official Smart SIM Registration Portal, Smart App, or at authorised Smart Stores. |
TNT Regular SIM vs TNT eSIM
TNT offers both a traditional physical SIM card and a modern eSIM option. While both provide the same mobile services, they differ in installation, convenience, and device compatibility.
| Feature | TNT Regular SIM | TNT eSIM |
|---|---|---|
| SIM Type | Physical SIM card | Digital SIM built into the device |
| Activation Method | Insert the SIM card into your phone | Scan a QR code to activate without a physical SIM |
| Availability | Available at Smart retail stores and authorised dealers | Available online, at Smart Stores, and selected retailers |
| Security | Can be lost, damaged, or replaced | Stored securely inside the device, reducing the risk of loss |
| Convenience | Requires inserting or replacing a SIM card | No physical SIM handling required |
| Device Compatibility | Compatible with most smartphones that support physical SIM cards | Requires an eSIM-compatible device, including selected Apple, Samsung, Huawei, Google Pixel, and other supported smartphones |
TNT online SIM Registration Rewards and Free Bonuses
Registering your TNT SIM card not only keeps your mobile service active but also lets you enjoy exclusive welcome rewards. Eligible subscribers receive 3GB of free mobile data after successfully completing the SIM registration process. Once your registration has been verified, Smart will send a confirmation text message informing you that your free data bonus has been credited to your account.
Free Bonuses for New TNT SIM Cards
| TNT SIM Package | Included Rewards | Validity |
|---|---|---|
| Regular TNT SIM | Up to 25GB of mobile data plus free calls and text messages | 7 Days |
| TNT 5G SIM Bundle | 25GB of data with ₱5 to ₱55 free load | 7 Days |
| TNT SIM + Merchandise Bundle | Mobile data, free load, and promotional merchandise such as a bag or T-shirt | 7 Days |
Tips for a Successful TNT SIM Registration
To avoid registration errors and speed up the approval process, keep these important tips in mind before submitting your TNT SIM registration.
FAQs About TNT online Registration 2026
Conclusion
Completing your TNT SIM registration is a simple yet essential step to keep your mobile number active and compliant with the Philippines’ SIM Registration Act. Whether you choose to register through the official Smart SIM Registration Portal, the Smart GigaLife App, or by visiting a Smart Store, the process is straightforward and completely free. Simply prepare a valid government-issued ID, provide accurate personal information, and complete the required verification steps.
Once your this is successfully registered, you can continue enjoying uninterrupted calls, text messaging, mobile data services, exclusive TNT promos, and free registration rewards. To avoid delays or security risks, always use official TNT SIM Registration channels and ensure that the information you submit is accurate. If you encounter any issues during registration or verification, contact Smart Customer Support or visit the nearest Smart Store for professional assistance.