GOMO SIM Philippines 2026: Registration, Activation, APN Settings, Login & Complete User Guide

If you have recently purchased a GOMO SIM in the Philippines, the first things you need to understand are GOMO SIM registration, GOMO activation, account setup, mobile data configuration and troubleshooting. GOMO is an all-digital mobile brand that operates on Globe Telecom’s nationwide network, giving customers access to mobile services through the GOMO PH app rather than a traditional physical shop-based experience.
One of the main reasons people choose GOMO is its No Expiry Data offers. The service also provides flexible “Mo ’Creds” options, allowing eligible data packages to be converted for other mobile needs. Whether you are using a physical SIM or an eSIM, the setup process is designed to be completed digitally.
GOMO SIM Philippines at a Glance
| Information | Details |
|---|---|
| Mobile brand | GOMO |
| Network | Globe Telecom nationwide network |
| Main app | GOMO PH |
| SIM options | Physical SIM and eSIM |
| Notable offer | No Expiry Data |
| Data feature | Mo ’Creds conversion |
| Registration | Required under Philippine SIM registration law |
| Main setup method | GOMO PH app |
| Government law | Republic Act No. 11934 |
What makes GOMO different?
GOMO is built around a digital-first mobile experience. Instead of relying heavily on physical service counters, customers can manage important services through the app. This includes account access, SIM-related processes and mobile data management.
The GOMO SIM registration process is particularly important because an unregistered SIM cannot be used normally for mobile services covered by the SIM Registration Act. Having your identification document ready before starting can make the process much smoother. Visit Homepage
Before You Start Your GOMO SIM Registration
A little preparation can prevent most registration problems. Before opening the GOMO PH app, make sure you have the following:
Examples of government-issued identification documents may include a UMID, passport, driver’s licence or Philippine Identification Card, provided the document is accepted during the registration process.
GOMO SIM Registration process in Philippines
The registration process takes place digitally through the GOMO PH app. If you have a physical SIM, insert it into your phone first. For an eSIM, follow the installation instructions supplied with your order.
Step 1: Install Your GOMO SIM or eSIM
Start by preparing the SIM on an unlocked compatible smartphone. Physical SIM users can insert the card, while eSIM users should install their digital SIM profile using the instructions provided with their order.
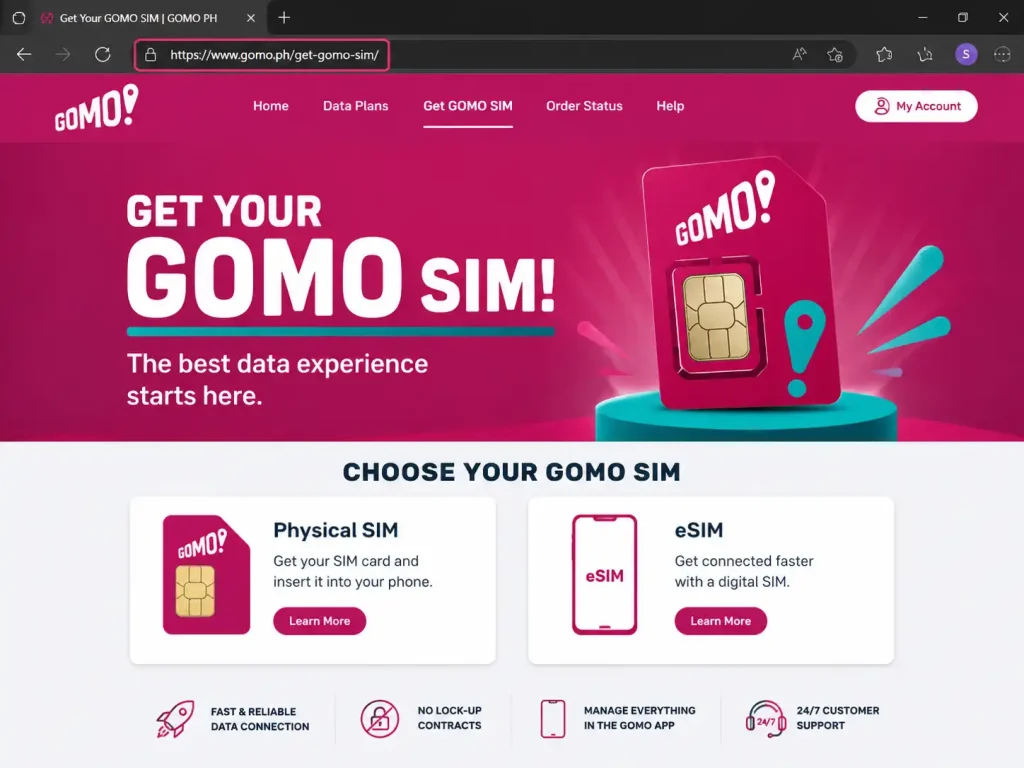
For a physical SIM, SIM Slot 1 can be used where supported by your device. Once your SIM is ready, visit the official GOMO PH website to access the latest SIM products, account services and official setup information before continuing with registration.
Step 2: Open the GOMO PH App and Enter Your Number
Launch the GOMO PH app and select Get Started. Enter the 11-digit GOMO mobile number associated with your SIM or eSIM order.

Step 3: Submit Your Identification Details
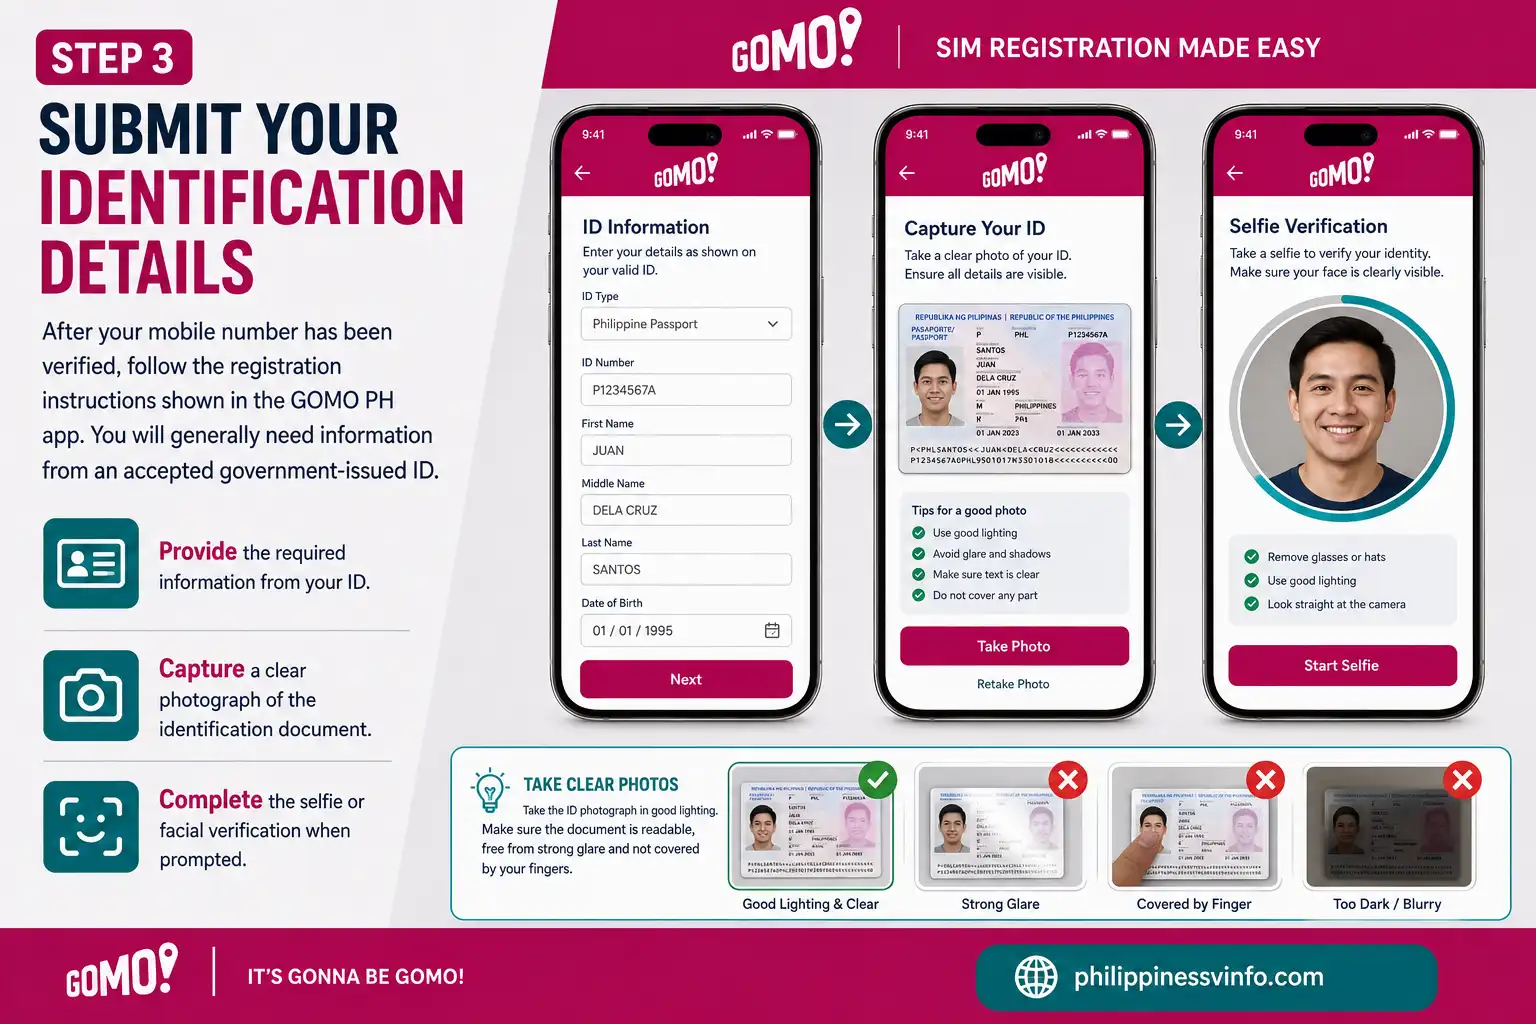
After your mobile number has been verified, follow the registration instructions shown in the GOMO PH app. You will generally need information from an accepted government-issued ID.
Take the ID photograph in good lighting. Make sure the document is readable, free from strong glare and not covered by your fingers.
Step 4: Review Your Registration Information
Before submitting the application, carefully check every detail you entered. This is especially important because incorrect information can cause registration problems.
Once everything is accurate, agree to the applicable terms and submit the registration request through the app.

Step 5: Wait for GOMO Registration Confirmation
After submission, GOMO will process the registration. A confirmation may be provided through SMS or displayed inside the application once the registration has been approved.
Successful registration allows you to continue with the remaining account and activation setup.

GOMO SIM Activation After Registration
This SIM registration and account activation are closely related, but they are not exactly the same step. After completing your registration, open the GOMO PH app and sign in using your registered GOMO mobile number. You can then complete your account setup by creating a 6-digit PIN and, if supported by your device, enabling biometric authentication such as fingerprint or Face ID. Once the setup is complete, your available data and account information should appear on the app’s home dashboard.
After activation, the GOMO PH app allows you to manage your mobile service and access available account features. You can check your remaining data, view active offers, access vouchers, review transaction history and use eligible Mo ’Creds options. GOMO’s No Expiry Data is another notable feature, with eligible data packages remaining available according to the specific terms of the offer rather than a standard fixed expiry period.
What Can You Do After GOMO SIM Activation?
Once your GOMO account is active, the GOMO PH app can be used to manage different aspects of your mobile service, depending on the features and offers available to your account.
Key features may include:
One of GOMO’s notable features is No Expiry Data, which allows eligible data offers to remain available according to the specific conditions of the package rather than following a standard fixed expiry period.
GOMO APN Settings for Mobile Data
In many cases, your smartphone will automatically receive the required network configuration after inserting and activating this SIM.
If calls or SMS work but mobile data does not, checking the APN (Access Point Name) can be useful.
The APN tells your phone which network gateway to use for mobile internet access.
Recommended GOMO APN information
| Setting | Value |
|---|---|
| Name | GOMO |
| APN | gomo.ph |
| Proxy | Not Set |
| Port | Not Set |
| Username | Not Set |
| Password | Not Set |
| APN Type | default,supl |
| APN Protocol | IPv4/IPv6 |
Only change APN information when necessary. If mobile data is already working, there is normally no reason to modify the network configuration.
GOMO APN Setup on Android
The exact menu names may vary depending on your Android manufacturer and software version, but the APN settings are generally located under the mobile network section.
Go to:
Settings → Connections / Mobile Network → Access Point Names → Add New APN
Enter the following GOMO configuration:
Leave Proxy, Port, Username and Password blank unless your device specifically requires additional values. After entering the information, save the new APN and select the GOMO profile as the active option.
Once the profile is selected, turn Mobile Data off and back on. If the connection still does not work, restart your smartphone and test the data connection again.
GOMO APN Settings on iPhone
On a compatible iPhone, APN settings can be accessed through the cellular network configuration menu. Open:
Settings → Cellular → Cellular Data Network
Under Cellular Data, locate the APN field and enter:
APN: gomo.ph
If your iPhone provides a save option, save the configuration and then toggle Cellular Data off and on to refresh the connection.
If the Cellular Data Network or APN option is not available, your carrier or device may be managing these settings automatically. In that case, avoid modifying unrelated network configurations and use the available carrier settings instead.
Registration Problems and Solutions
Even when the process is digital, users can encounter problems during registration or activation. Most issues can be narrowed down to connectivity, SIM installation, verification or application problems.
| Problem | Possible reason | What to try |
|---|---|---|
| No signal | SIM placement or network coverage | Reinsert the SIM, toggle Airplane Mode and check network coverage |
| Mobile data unavailable | Incorrect APN or inactive data service | Check that GOMO is selected for mobile data and review the APN |
| OTP missing | Signal delay or message filtering | Wait briefly, check blocked/spam messages and request another OTP |
| App login failure | Outdated or malfunctioning app | Update GOMO PH or clear the app cache |
| Registration rejected | Incorrect or unclear information | Review your ID details and registration information |
| eSIM not working | Profile not installed correctly | Check the eSIM installation and device settings |
How to Check Your GOMO Data Balance
The easiest way to see your remaining GOMO data is through the GOMO PH app. After logging in, open your account dashboard to view your current data and other account details.
The dashboard also gives you access to useful account-management features, including vouchers, your profile and transaction history. Checking these details before buying another promo can help you avoid purchasing data you don’t currently need.
Check these details regularly
How to Log In to Your GOMO Account
Your GOMO account login requires your registered GOMO mobile number and 6-digit PIN. The official GOMO login interface also includes a Forgot PIN? option if you cannot remember your PIN.
GOMO login steps
- Open the official GOMO PH app or GOMO login page.
- Enter your registered GOMO mobile number.
- Type your 6-digit PIN.
- Select Log in.
- Open your account dashboard after successful verification.
If your compatible phone supports biometric authentication, you may also be able to use the available fingerprint or Face ID option.
Forgot your GOMO PIN?
If you cannot remember your PIN, avoid repeatedly entering random numbers. Select Forgot PIN? and follow the verification instructions provided by GOMO.
If your account is temporarily restricted after unsuccessful attempts, wait for the stated period and then use the official PIN recovery process.
GOMO eSIM: A Simple Explanation
A GOMO eSIM works like a regular SIM but is installed digitally inside a compatible smartphone. Instead of inserting a plastic SIM card, you download and activate the required eSIM profile on your device.
GOMO offers local eSIM options alongside physical SIM products, although available offers and pricing can change. Check the current official GOMO listings before purchasing.
Physical SIM or eSIM?
| Feature | Physical SIM | GOMO eSIM |
|---|---|---|
| Plastic card | Yes | No |
| Installation | Insert SIM | Digital setup |
| Device requirement | Unlocked phone | eSIM-compatible phone |
| Easy to move between phones | Yes | Depends on device |
| Suitable for dual-SIM use | Depends on phone | Depends on phone |
The better option depends mainly on your smartphone and how you want to manage your mobile lines.
How to Install a GOMO eSIM
Installing a GOMO eSIM is a straightforward digital process, provided your smartphone supports eSIM technology. After purchasing your eSIM, use the installation instructions provided with your specific GOMO order and ensure your device is connected to a reliable internet connection.
Before starting the installation
Follow the on-screen instructions to download and install the GOMO eSIM profile. Once the installation is complete, open your phone’s Cellular or SIM settings and confirm that the GOMO line appears and is enabled.
Important: Do not delete an installed GOMO eSIM profile unless you have the required information to reinstall it or understand the recovery process.
What to Do When GOMO Has No Signal
Since GOMO operates through Globe’s network infrastructure, service availability depends on network coverage and conditions in your area.
If your phone shows No Service, Searching or a similar message, start with basic checks before changing advanced settings.
Try these fixes first
Then confirm that GOMO is enabled in your SIM or cellular settings and check whether network service is available in your location.
If calls and SMS work but mobile data does not, review the GOMO APN settings covered earlier in this guide.
Keep Your GOMO Account Safe
Your GOMO account can contain personal and mobile-service information, so protecting your login details is important. Never give your OTP, 6-digit PIN or verification codes to another person.
Be cautious of messages asking you to click an unfamiliar link to register, verify or activate your SIM. When you need to access your account, go directly to the official GOMO website or app instead.
Security mistakes to avoid
A message may look genuine without actually being from GOMO. If you’re unsure, open the official GOMO website directly instead of following a link from an unexpected SMS or social-media message.
GOMO Physical SIM or eSIM: Which Is Better?
The right choice depends on your phone and how you use your mobile connection. A physical SIM may be more practical if you regularly move the SIM between devices, while an eSIM can be convenient if your smartphone supports digital SIM technology.
A physical GOMO SIM promo may suit you if:
A GOMO eSIM may be better if:
For current products and availability, check GOMO’s official listings rather than relying on older promotional information.
GOMO Setup Errors You Should Avoid
Most setup problems are caused by small mistakes in registration, SIM selection, network configuration or account security. Knowing what to avoid can make the process smoother.
GOMO SIM Registration: Final Setup Checklist
Before you start using your SIM Philippines, go through this quick checklist. It helps confirm that your SIM, account, registration and mobile data settings are ready.
If everything is checked, your GOMO SIM Philippines should be ready for normal use.
What to Do If GOMO SIM Registration Fails
A failed GOMO SIM registration does not always mean there is a problem with the SIM. Incorrect information, an unclear ID photo, incomplete facial verification, poor internet connectivity or an app issue can interrupt the process.
Start by checking the information and documents you submitted before trying again.
Check these things first
If registration still fails, use GOMO’s official support channels instead of unofficial websites or social-media accounts.
GOMO OTP Not Received? Try These Fixes
The OTP helps verify your GOMO mobile number during registration and account access. If the code does not arrive, give it a little time instead of repeatedly requesting new codes.
Try these quick fixes:
- Wait briefly for the OTP.
- Check blocked or spam messages.
- Confirm that your SIM has network signal.
- Turn Airplane Mode on and off.
- Request another OTP.
- Restart your phone if needed.
If you cannot receive other SMS messages either, the issue may be related to your network connection rather than the GOMO app.
GOMO SIM promo Shows No Signal
If your phone displays No Service, No Signal or Searching, first check whether the SIM is correctly installed and recognised by your device.
For a physical SIM, remove it carefully and reinstall it. If you use a dual-SIM phone, also check that the GOMO line is enabled in your cellular settings.
Quick things to try
For a GOMO eSIM, check that its profile is installed and enabled. Do not delete the eSIM simply because the network is temporarily unavailable.
GOMO Mobile Data Not Working
If your GOMO SIM has network signal but you cannot access the internet, check your basic mobile-data settings first.
Make sure Mobile Data is switched on and GOMO is selected as the preferred data SIM if you have two active lines.
If the problem continues, check the APN configuration.
GOMO APN Settings
| Setting | Recommended Value |
|---|---|
| Name | GOMO |
| APN | gomo.ph |
| Proxy | Not Set |
| Port | Not Set |
| Username | Not Set |
| Password | Not Set |
| APN Type | default,supl |
| APN Protocol | IPv4/IPv6 |
After saving the APN, select it and switch mobile data off and on again. Restart the phone if necessary.
If your internet was working before you changed the APN, avoid creating several new profiles. Restoring the previous working configuration may be the better option.
GOMO eSIM Not Working? Check These Settings
A GOMO eSIM works without a physical SIM card, but your phone must support eSIM and the digital profile must be installed correctly.
If your GOMO eSIM is not connecting, check the following areas before contacting support.
1. Check eSIM compatibility
Confirm that your smartphone supports eSIM and that your particular device variant supports the required cellular configuration.
2. Check the installed profile
Open your phone’s SIM or cellular settings and confirm that the GOMO eSIM appears and is enabled.
3. Select GOMO for mobile data
If another SIM is active, make sure GOMO is selected as the mobile-data line when you want to use its internet connection.
4. Avoid deleting the eSIM
Do not remove the GOMO eSIM profile unnecessarily. Reinstalling it may require additional installation information or assistance from GOMO.
If the eSIM still does not connect after these checks, use GOMO’s official support options.
Can GOMO Work on a Dual-SIM Phone?
Yes, but the exact setup depends on your smartphone’s hardware and supported SIM configuration. Some phones can use a physical SIM and eSIM together, while others support different combinations.
When using GOMO alongside another SIM, check which line is assigned to each service:
This is particularly important when your SIM shows a signal but mobile internet is not working.
How to Protect Your GOMO Account
Your GOMO account should be protected just like any other important online account. Your mobile number may be connected to other digital services, so keeping your login credentials private is essential.
Follow these simple security habits
Frequently Asked Questions About GOMO SIM Philippines
Conclusion
The GOMO SIM Philippines 2026 setup is designed to be managed digitally, from SIM registration and account activation to data management, APN configuration, eSIM installation and troubleshooting. Whether you use a physical SIM or a compatible eSIM, preparing your valid ID, mobile number, internet connection and GOMO PH app before starting can make the registration process much easier.
After successful registration and activation, users can manage their GOMO account through the app, check their data balance, access available offers, configure mobile-data settings and use features such as No Expiry Data and eligible Mo ’Creds options. If you experience problems such as missing OTPs, no signal, unavailable mobile data or eSIM connectivity issues, checking the SIM settings, APN configuration, network connection and account information can help identify the cause. Most importantly, keep your 6-digit PIN, OTP and personal information private, and use official GOMO channels whenever you need to register, log in, purchase a SIM or request support.