PAIS Philippines 2026: Complete Login, Password Reset & Troubleshooting Guide
For Philippine National Police (PNP) personnel, maintaining accurate and up-to-date personnel records is essential for official documentation, administrative processes and other personnel-related requirements. The Personnel Accounting Information System provides authorised users with convenient online access to selected personnel information and digital services, helping reduce reliance on traditional paper-based processes.
PAIS stands for Personnel Accounting Information System and is intended for eligible active PNP personnel and non-uniformed personnel (NUP). After signing in with their registered credentials, authorised users can access the personnel services available to their account, including the Certificate of Declared Legal Beneficiaries. Understanding how to log in, reset a forgotten password and resolve common access or certificate problems can make this process easier and more efficient.
What Is PAIS in the Philippines?
PAIS pnp stands for Personnel Accounting Information System. It operates within the Philippine National Police environment and supports authorised personnel with digital access to personnel-related information and administrative services.
Instead of depending entirely on paper-based requests, eligible users can access services made available through their account. One of the documents associated with the portal is the Certificate of Declared Legal Beneficiaries.
This is not a general public website. Access is intended for authorised personnel, so your login details should be kept private and used only through the official portal. Visit Homepage
Who Can Access
The intended users include:
Your ability to use the portal depends on having valid registered credentials. If your account is inactive or your details are no longer current, you may need assistance from the appropriate personnel or administrative office.
Login Requirements
Before attempting to log in, make sure you have the information connected with your official account. Preparing these details first can reduce common login problems.
| Requirement | Purpose |
|---|---|
| Active this account | Allows authorised access to the system |
| PNP Badge/ID Number or registered User ID | Used to identify the account |
| Password | Confirms your identity during sign-in |
| Registered email address | May be needed for account recovery |
| Internet connection and browser | Required to reach the online portal |
Your registered email is particularly important when recovering access. If the email attached to your personnel account is outdated or unavailable, the normal recovery process may not work.
How to Log In to the PAIS Philippines Portal
This login process can normally be completed in a few stages. Use the official portal, enter your registered details carefully and follow any security instructions shown on the current login page.
Step 1: Open the Official Website
Start by opening your internet browser and visiting the authorised PAIS Philippines portal provided by the Philippine National Police.
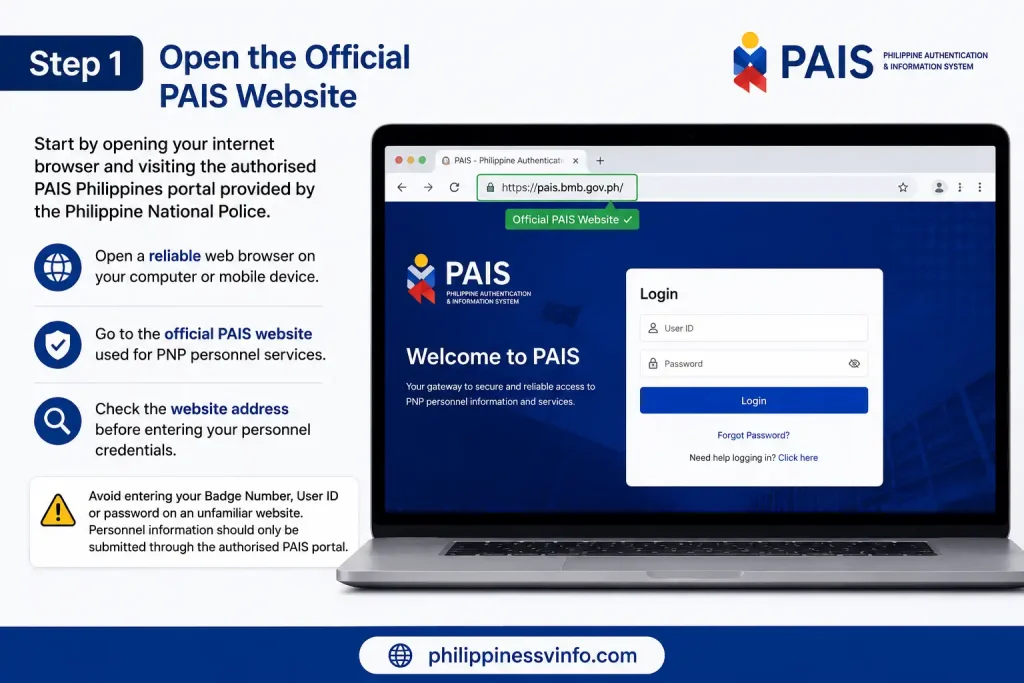
Avoid entering your Badge Number, User ID or password on an unfamiliar website. Personnel information should only be submitted through the authorised this portal.
Step 2: Locate the Login Page
Once the portal loads, find the login area. The current layout may change over time, so the position and appearance of individual fields may not always look exactly the same.
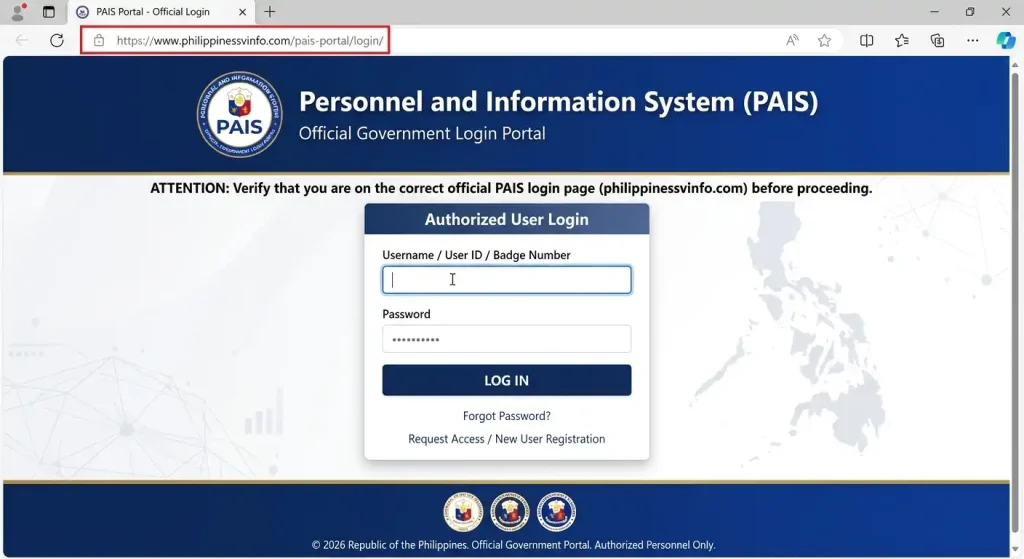
If the portal displays additional instructions, read them before submitting your information.
Step 3: Enter Your User ID or Badge Number
Enter the identification information connected with your account.
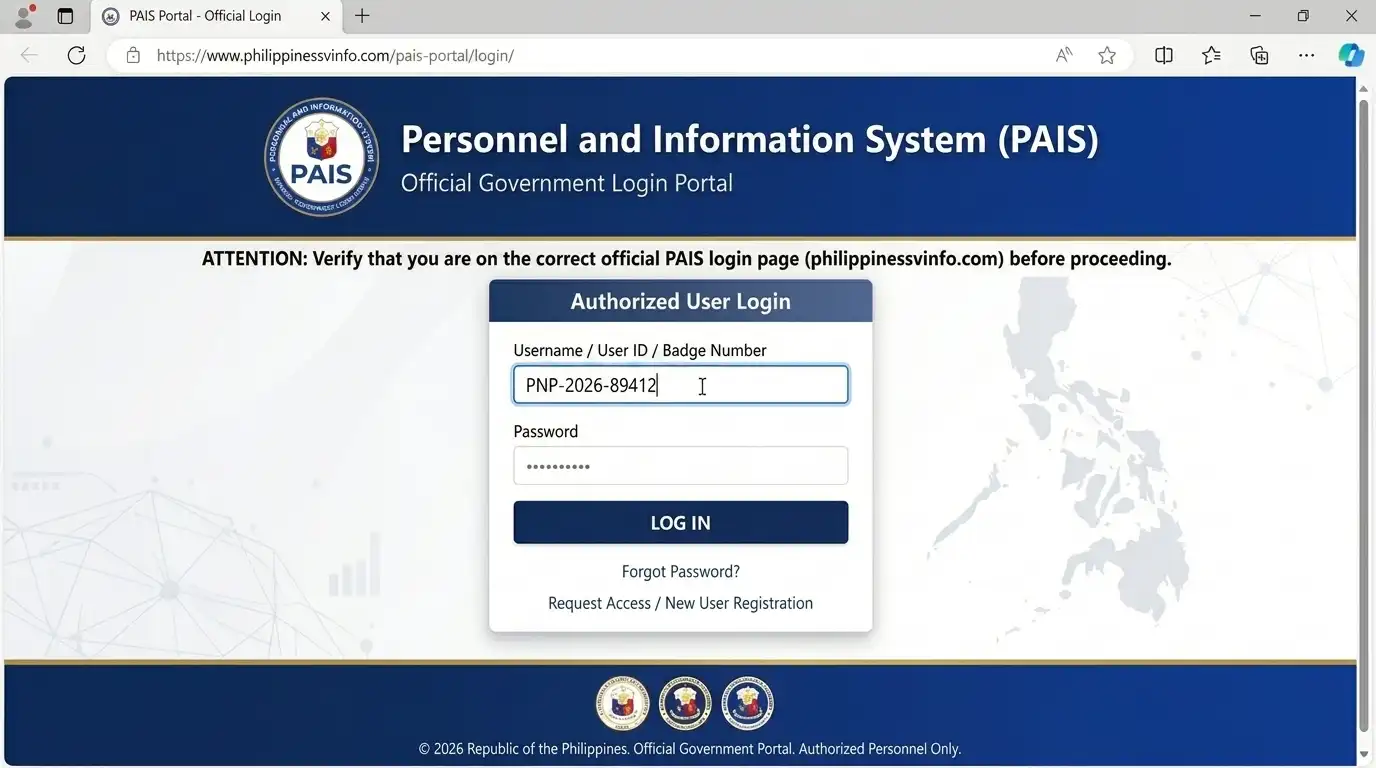
A single incorrect character can prevent a valid account from being recognised.
Step 4: Enter Your Password
Next, enter the password associated with your portal account.

If you cannot remember the password, use the recovery option rather than repeatedly entering incorrect credentials.
Step 5: Complete CAPTCHA or Security Verification
Some versions of the login page may display a CAPTCHA or another security check.
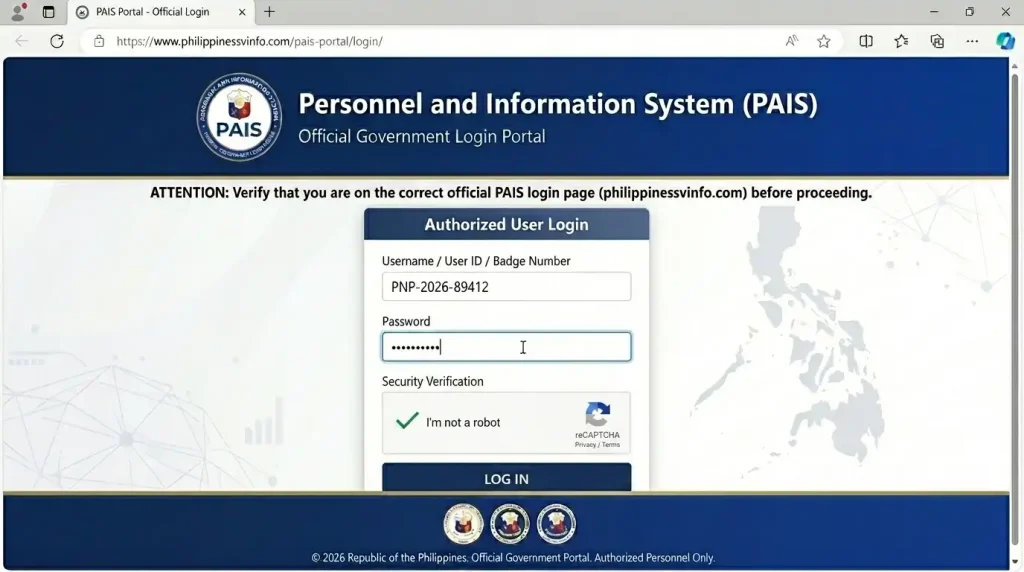
These checks are intended to help reduce automated or unauthorised access.
Step 6: Click the Login Button
After checking all information, submit the login form.
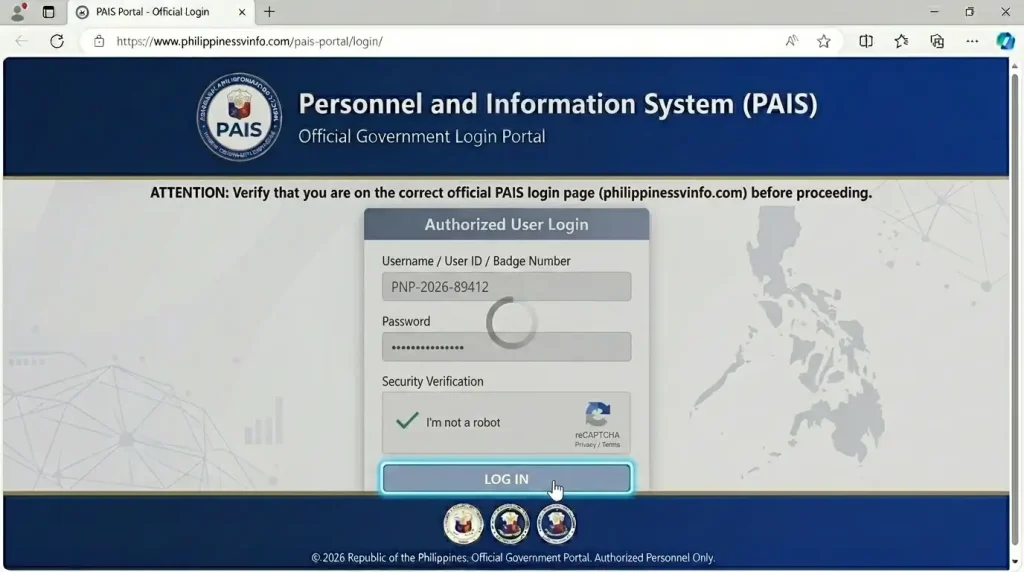
If the login fails, check your User ID, Badge Number and password before trying again.
Step 7: Open the Required Personnel Service
After successful authentication, you can review the services available to your account.
The exact menu names can change when the portal is updated, so follow the options currently displayed on your account.
Forgot Your Password? Follow These Steps
If you cannot remember your password, you should use the recovery facility available on the login page rather than attempting to create another account.
Look below or around the login fields for an option such as Forgot Password? or Reset Password. The wording may differ depending on the current version of the portal.
PAIS Password Reset
The general recovery process can be followed as follows:
- Open the official PAIS login page.
- Select Forgot Password? or Reset Password.
- Enter your registered Badge Number or User ID.
- Provide the official email address associated with your account.
- Check your registered email inbox.
- Open the recovery message and follow its instructions.
- Create and confirm a new password.
- Return to the PAIS login page and sign in with the new password.
The exact screens and verification instructions may change with the portal’s configuration. Always follow the instructions displayed by the official system.
What to Do When Password Recovery Fails
If PAIS password recovery fails, especially when the email address linked to your account is no longer accessible or has not been updated, you may need administrative assistance. In this situation, contact your regional or unit RPHRDD (Regional Personnel and Human Resource Development Division) / Administrative Officer and explain the account or credential issue so they can guide you through the appropriate recovery process.
For security, never share your password with another person, even if they offer to help recover your account. Use only the appropriate PNP administrative support channels and follow the official account-recovery procedures to protect your personnel information.
Troubleshooting Guide
| PAIS pnp Issue | Recommended Solution |
|---|---|
| Unable to Access this Login Page | Check your internet connection, restart your browser, and try opening the pnp PAIS portal again. If the issue continues, contact the appropriate PNP technical support channel or your unit administrator. |
| Incorrect Username or Badge Number | Enter your registered Badge Number, User ID, or username exactly as required. If you are unsure which identifier is registered, contact your appropriate administrative office. |
| Password Recovery Email Is Not Received | Check the inbox and spam/junk folder associated with your official this account. Verify that you are using the correct registered email address. If the email is outdated or inaccessible, contact your RPHRDD or Administrative Officer. |
| Account Access Problems Continue | If the available recovery process does not restore access, contact your regional or unit personnel administrator for assistance. |
| Certificate Option Is Not Visible | Return to the Personnel section and review the available services. If the certificate function is still unavailable, contact your unit administrator or appropriate PNP support channel. |
| Certificate Does Not Generate | Check that the required information has loaded correctly. Sign out, reopen this portal, and start a new session. If the problem continues, report it through the appropriate technical or administrative support channel. |
| Generated Document Is Incorrect | Do not use an incorrect certificate for an official purpose. Request correction of the underlying personnel or beneficiary information through the appropriate administrative process, then generate a new certificate when available. |
| Security Concern | Use official pnp PAIS/PNP channels only. Do not provide your username, password, or other credentials to unofficial websites or third-party services. |
Certificate Troubleshooting
Problems can also occur after successfully logging into the portal.
Certificate Option Is Not Visible
If you cannot find the certificate function, return to the Personnel section and review the available services.
If the function is still unavailable, contact your unit administrator or appropriate PNP support channel. Do not assume that an unavailable menu item means that your account has been deleted or disabled.
Certificate Does Not Generate
If the certificate page opens but the document does not generate, check that the required information has loaded correctly.
You can try signing out, reopening this portal and starting a new session. If the problem continues, report the issue to the appropriate technical or administrative support channel.
Generated Document Is Incorrect
If the generated certificate contains incorrect beneficiary information, stop before using it for an official purpose.
The correct approach is to have the underlying personnel information reviewed and updated through the appropriate administrative process. Once the record has been corrected, a new certificate can be generated when available.
Protecting Your Account
A PAIS online account can provide access to sensitive personnel information, so basic account security should be taken seriously.
Use Your Own Credentials
Never give your portal username, Badge Number or password to another person merely to make the login process easier.
If another person needs to assist you, ask your authorised PNP administrative or technical office for the correct procedure.
Keep Your Email Information Current
Your registered email can be important for account recovery. If your official personnel information changes, follow the appropriate procedure for updating your record.
An inaccessible recovery email can make a forgotten-password situation more difficult to resolve.
Be Careful With Saved Documents
A Certificate of Declared Legal Beneficiaries can contain personal information about you and your declared beneficiaries.
If you download a copy, store it somewhere secure. Avoid leaving personnel documents on a shared computer or sending them through an untrusted platform.
Common PAIS Mistakes to Avoid
A few simple mistakes can cause unnecessary delays.
When Should You Contact PNP Support?
Self-service options are useful for routine access, but some situations require assistance from an authorised PNP office.
Consider contacting your appropriate RPHRDD / Administrative Officer when:
For technical problems involving the portal itself, the supplied information identifies the PNP IT Management Service (ITMS) helpdesk or your unit administrator as potential support channels.
How to Generate the Beneficiary Certificate
Once you have logged into the PAIS Philippines portal, you can move to the personnel service used for the Certificate of Declared Legal Beneficiaries. The certificate is prepared from the beneficiary information already recorded in your personnel account, so checking those details first is essential.
This interface may change when the system is updated. As a result, menu labels, buttons and page layouts may not always match older guides. The main process remains the same: access the personnel area, open the beneficiary certificate service, verify the displayed information and generate the document.
Step-by-Step Certificate Process
Step 1: Log In to PAIS online
Sign in to your active online PAIS account using your registered credentials and access your personnel dashboard.
Step 2: Open the Personnel Area
From the dashboard, locate the Personnel section where personnel-related services are available.
Step 3: Open the Beneficiary Certificate Service
Find the Certificate of Declared Legal Beneficiary option or similar wording and open the service.
Step 4: Check the Recorded Beneficiaries
Review the beneficiary information displayed in PAIS online before generating the certificate.
Step 5: Generate or Print the Certificate
Once the information is correct, use the available option to generate or print the certificate.
Step 6: Save or Print Your Certificate
After the certificate is generated, save the electronic copy or print it if a paper copy is required.
Security reminder: Never provide your PAIS online password or confidential personnel documents to unauthorised people or unfamiliar websites. If you need assistance, use the appropriate PNP administrative channel.
What If Your Beneficiary Information Is Incorrect?
Checking your beneficiary information before generating the certificate is an important part of the process. If a beneficiary’s name, relationship or other information is missing or incorrect, producing the certificate again is unlikely to resolve the underlying record issue.
In that situation, contact the appropriate RPHRDD or Administrative Office and ask how your personnel record should be corrected.
You may be asked to provide supporting documentation. Examples mentioned for this type of update include:
The exact documents required can depend on the correction being requested. Follow the instructions given by the relevant PNP office rather than submitting documents that have not been requested.
Certificate Download and Printing Tips
After generating the Certificate of Declared Legal Beneficiaries, take a moment to inspect the document before using it for an official purpose.
Check the following:
If the certificate is provided as a PDF, open the file before ending your online PAIS session. This lets you confirm that the document was generated properly and can be opened without errors.
For a physical copy, make sure the printer has enough paper and ink. You can also save the document first and print it later using an authorised device.
Common PAIS Problems and Practical Solutions
| PAIS Problem | Practical Solution |
|---|---|
| PAIS Login Does Not Work | Check your User ID, Badge Number, and password for typing errors. Complete any CAPTCHA or security verification correctly and avoid repeated unsuccessful login attempts. |
| You Cannot Remember Your Password | Use the password-recovery option on this login page and follow the verification instructions. If you cannot access the registered email, contact your RPHRDD or Administrative Officer. |
| The Certificate Page Will Not Open | Refresh the page, reopen this website, and sign in again. If the problem continues despite a working internet connection, contact your appropriate technical or administrative support channel. |
| A Beneficiary Is Missing | Contact the responsible personnel or administrative office to ask about updating the personnel record and any supporting documents that may be required. |
| Information on the Certificate Is Wrong | Do not use the incorrect certificate for an official requirement. Contact the responsible administrative office and request correction of the underlying personnel or beneficiary record. |
Frequently Asked Questions About PNP PAIS
Conclusion
The PAIS online Philippines 2026 portal provides authorised PNP personnel with convenient access to personnel information and selected administrative services, including the Certificate of Declared Legal Beneficiaries. By using the correct login credentials, following the password-recovery process and checking recorded beneficiary information carefully, users can complete common tasks more efficiently.
If you experience login, password, certificate or personnel-record problems that cannot be resolved through the available online options, contact your appropriate RPHRDD, Administrative Officer, unit administrator or authorised PNP technical support channel. Always use official online PAIS/PNP systems, keep your credentials private and verify your information before using any generated personnel document for an official purpose.