Gomo SIM Registration 2026 Philippines: How to Register Your SIM Online
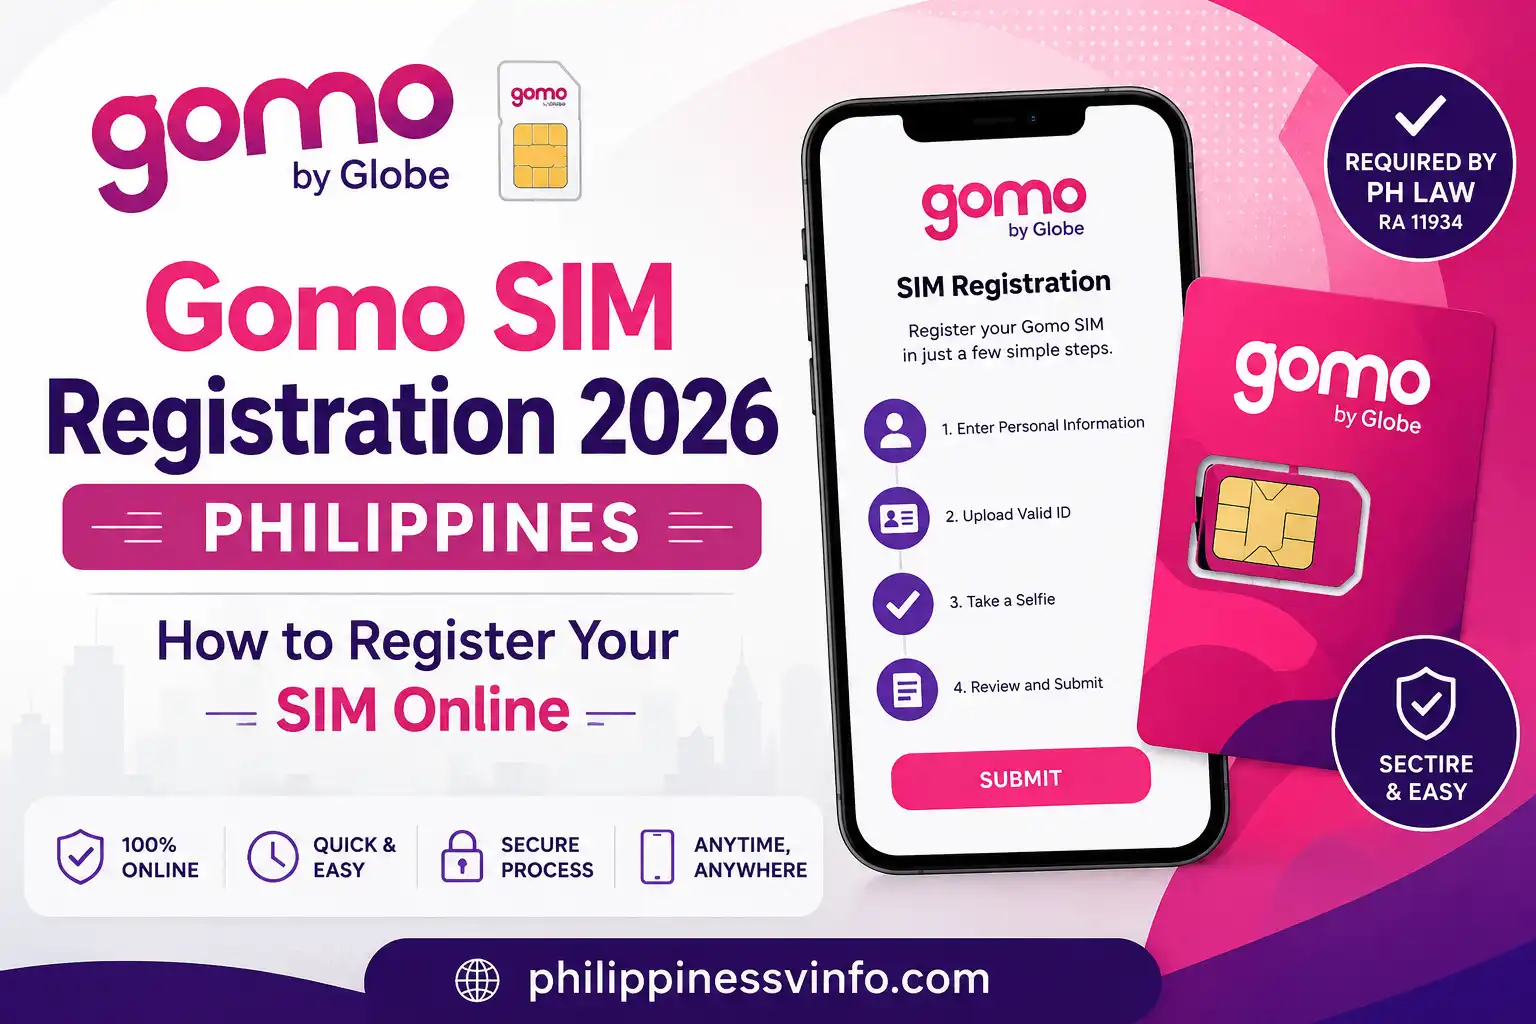
A GOMO SIM must be registered to comply with the Philippines’ SIM Registration Act before it can be used for regular mobile services. The GOMO SIM Registration requirement applies to new and existing GOMO SIM users, including eligible GOMO mobile and eSIM customers. The registration process requires customers to provide their personal information, a valid government-issued photo ID and the required identity verification details. GOMO customers should complete the process through the official GOMO registration channels and make sure all information submitted is accurate. SIM registration is also provided without a separate registration fee through the official process.
The requirement is based on Republic Act No. 11934, also known as the Subscriber Identity Module Registration Act. The law requires SIM users in the Philippines to register their mobile numbers as part of efforts to help prevent scams, spam, smishing and other crimes involving mobile communications. When completing GOMO SIM Registration, always use official GOMO or Globe-authorised channels and avoid unofficial websites or individuals asking for your mobile number, government ID, selfie or OTP. Keeping your registration information private can help protect your identity and mobile account from misuse.
What Is Globe SIM Registration?
GOMO SIM Registration is the process of registering your GOMO mobile number with the required subscriber and identity information under the Philippines’ SIM Registration Act. GOMO is a digital mobile service, so customers can use supported physical SIM and eSIM services without needing a traditional prepaid setup. Like other covered SIM users in the Philippines, GOMO customers need to complete the required registration process before using their SIM for regular mobile services.
During GOMO SIM Registration, individual users are generally asked to provide important personal information such as their full name, date of birth, gender or sex, nationality and complete address. The process also requires a valid government-issued identification document and identity verification, which may include taking a selfie through the registration system. Customers should carefully check that the information they provide matches their identification documents before submitting the form. Using the correct details and official GOMO registration channels can help prevent delays, verification problems and rejected submissions.
Why Do You Need to Register a Gomo SIM?
SIM registration helps create greater accountability by connecting a mobile number with verified subscriber information. In the past, prepaid SIM cards could be purchased and used without formally identifying the person using the number, which could make them easier to misuse for scams, phishing, fraudulent messages and other communication-related crimes. The SIM Registration Act was introduced to help authorities address these problems and improve accountability among mobile users. For GOMO customers, completing GOMO SIM Registration is also an important requirement for activating and continuing to use covered GOMO SIM services, including calls, text messages and mobile data. New GOMO SIM users should complete the required registration process before expecting full mobile service access. Visit Homepage
Globe SIM Registration Requirements
Before starting the GOMO SIM Registration process, prepare all the required information, documents and devices. Having everything ready can make the online registration easier and help you avoid unnecessary interruptions.
For an individual GOMO SIM Registration, prepare:
Accepted IDs for Globe SIM Registration
GOMO customers should use a valid government-issued identification document when completing GOMO SIM Registration. The exact ID options available may depend on the registration requirements and the information displayed during the registration process.
| Accepted ID | Registration Use |
|---|---|
| Philippine National ID | Individual verification |
| Passport | Individual verification |
| Driver’s License | Individual verification |
| UMID Card | Individual verification |
| SSS ID | Individual verification |
| PRC ID | Individual verification |
| PhilPost Postal ID | Individual verification |
| BIR/TIN ID | Individual verification |
| NBI Clearance | Identity verification |
| PhilHealth ID | Identity verification |
| OWWA ID | Identity verification |
| Voter’s ID | Identity verification |
| Senior Citizen ID | Identity verification |
| IBP ID | Identity verification |
Before uploading your ID for GOMO SIM Registration, make sure the document is clear and readable and that all important details can be seen properly. Avoid using blurry, cropped or damaged images because they may cause verification problems. Choose an ID that clearly shows your name, photograph and other required information so the registration system can process your identity details more easily.
Tip: Keep your original ID nearby while completing the registration process and carefully check that the information you enter matches the details shown on your identification document.
What Information Do You Enter?
The GOMO SIM Registration form is designed to verify the identity of the person using the SIM. Individual users need to provide important information such as their full name, date of birth, gender or sex, nationality and complete address, along with the required details from their valid government-issued ID. Make sure every detail you enter is accurate and matches your official documents, as even a small spelling mistake in your name or an incorrect date of birth can cause verification problems.
You should also have access to your GOMO SIM while completing the registration because an OTP (One-Time PIN) is used to verify the mobile number. Keep your SIM active and make sure it can receive SMS messages during the process. Enter the correct OTP when requested and never share the verification code with another person, even if they claim they are helping you complete your GOMO SIM Registration.
GOMO SIM Registration process in Philippines
The registration process takes place digitally through the GOMO PH app. If you have a physical SIM, insert it into your phone first. For an eSIM, follow the installation instructions supplied with your order.
Step 1: Install Your GOMO SIM or eSIM
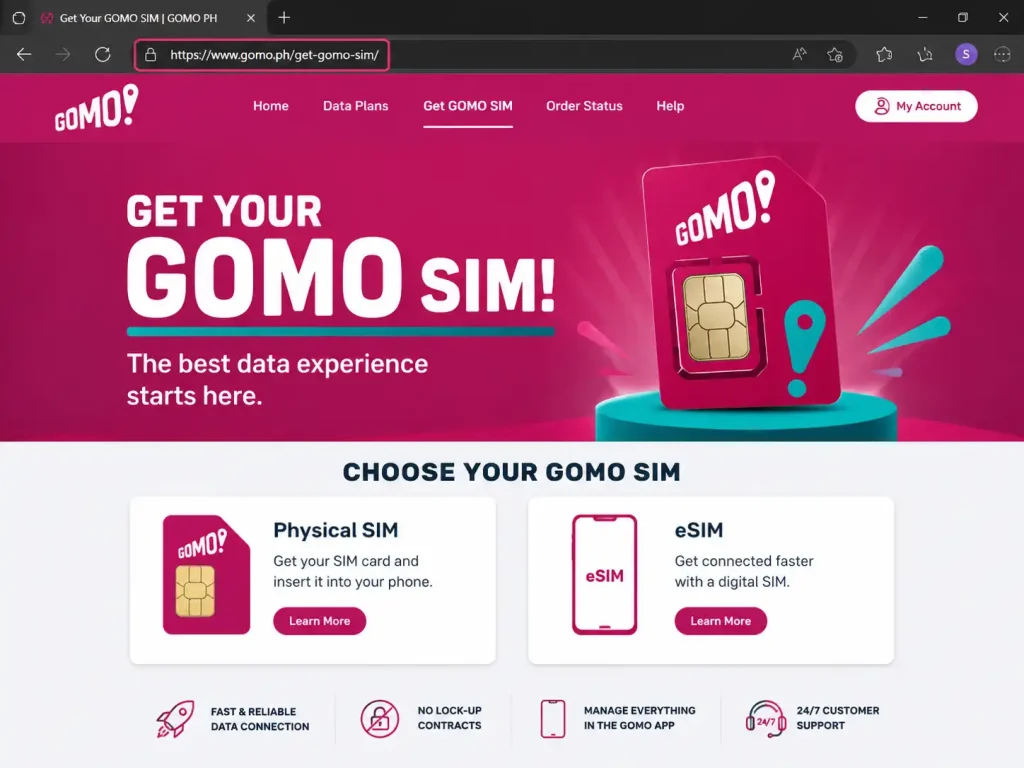
Start by preparing the SIM on an unlocked compatible smartphone. Physical SIM users can insert the card, while eSIM users should install their digital SIM profile using the instructions provided with their order.
For a physical SIM, SIM Slot 1 can be used where supported by your device. Once your SIM is ready, visit the official GOMO PH website to access the latest SIM products, account services and official setup information before continuing with registration.
Step 2: Open the GOMO PH App and Enter Your Number
Launch the GOMO PH app and select Get Started. Enter the 11-digit GOMO mobile number associated with your SIM or eSIM order.

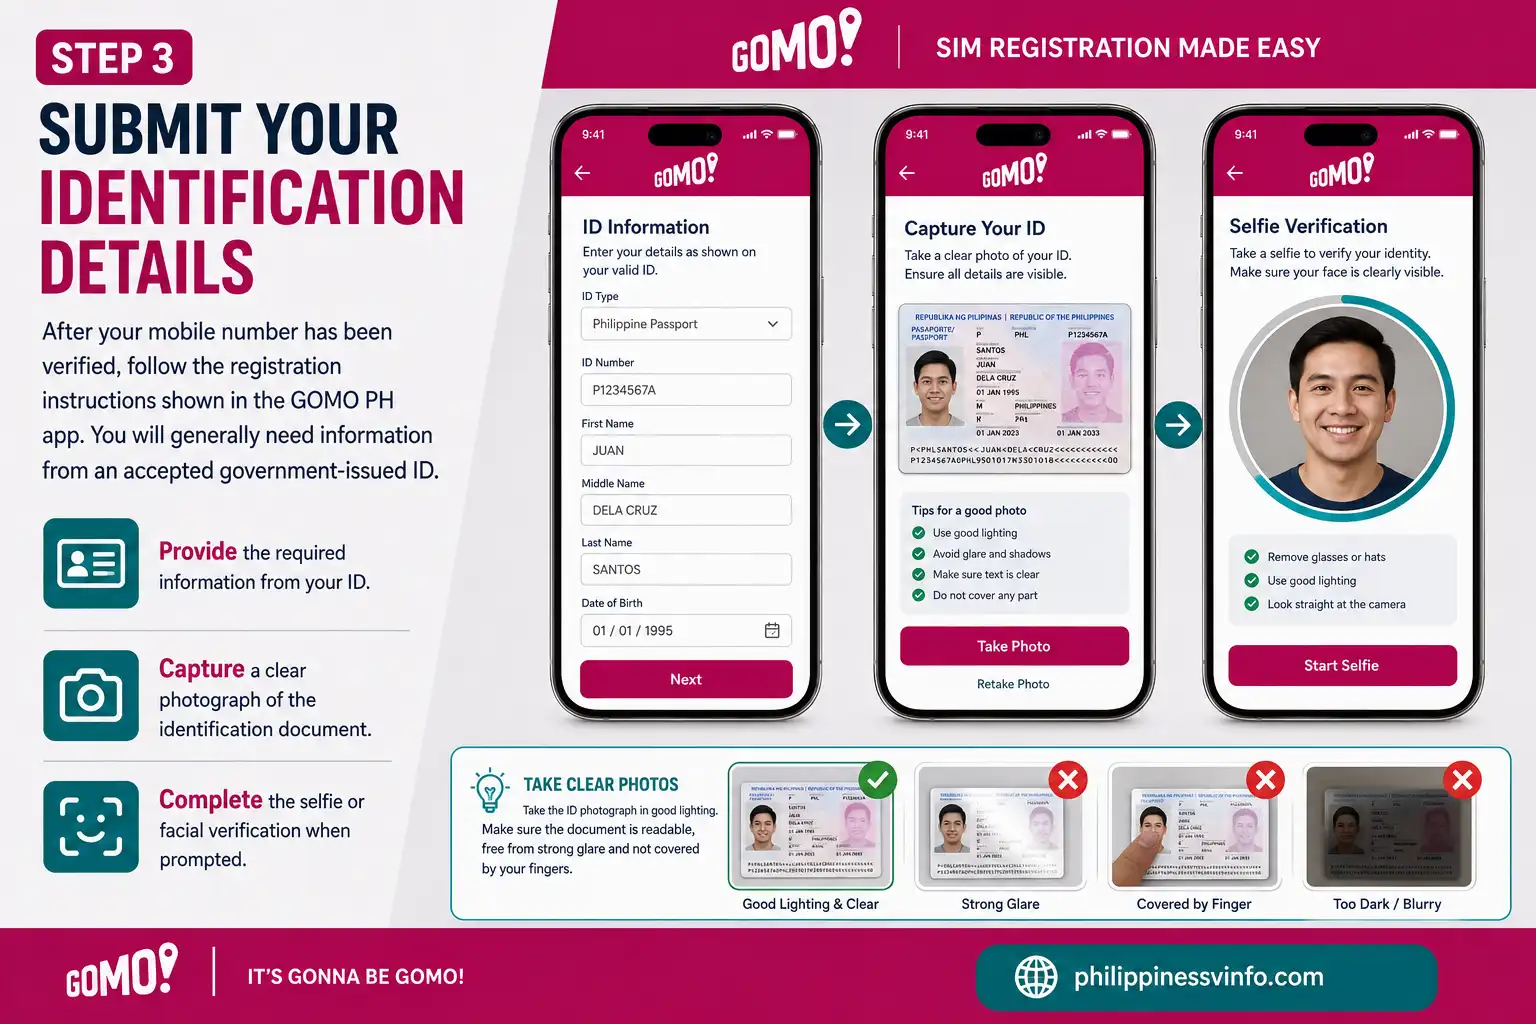
Step 3: Submit Your Identification Details
After your mobile number has been verified, follow the registration instructions shown in the GOMO PH app. You will generally need information from an accepted government-issued ID.
Take the ID photograph in good lighting. Make sure the document is readable, free from strong glare and not covered by your fingers.
Step 4: Review Your Registration Information
Before submitting the application, carefully check every detail you entered. This is especially important because incorrect information can cause registration problems.
Once everything is accurate, agree to the applicable terms and submit the registration request through the app.

Step 5: Wait for GOMO Registration Confirmation
After submission, GOMO will process the registration. A confirmation may be provided through SMS or displayed inside the application once the registration has been approved.
Successful registration allows you to continue with the remaining account and activation setup.

GOMO SIM Activation After Registration
This SIM registration and account activation are closely related, but they are not exactly the same step. After completing your registration, open the GOMO PH app and sign in using your registered GOMO mobile number. You can then complete your account setup by creating a 6-digit PIN and, if supported by your device, enabling biometric authentication such as fingerprint or Face ID. Once the setup is complete, your available data and account information should appear on the app’s home dashboard.
After activation, the GOMO PH app allows you to manage your mobile service and access available account features. You can check your remaining data, view active offers, access vouchers, review transaction history and use eligible Mo ’Creds options. GOMO’s No Expiry Data is another notable feature, with eligible data packages remaining available according to the specific terms of the offer rather than a standard fixed expiry period.
What Can You Do After GOMO SIM Activation?
Once your GOMO account is active, the GOMO PH app can be used to manage different aspects of your mobile service, depending on the features and offers available to your account.
Key features may include:
One of GOMO’s notable features is No Expiry Data, which allows eligible data offers to remain available according to the specific conditions of the package rather than following a standard fixed expiry period.
How to Check Your GOMO Data Balance
The easiest way to see your remaining GOMO data is through the GOMO PH app. After logging in, open your account dashboard to view your current data and other account details.
The dashboard also gives you access to useful account-management features, including vouchers, your profile and transaction history. Checking these details before buying another promo can help you avoid purchasing data you don’t currently need.
Check these details regularly
How to Log In to Your GOMO Account
Your GOMO account login requires your registered GOMO mobile number and 6-digit PIN. The official GOMO login interface also includes a Forgot PIN? option if you cannot remember your PIN.
GOMO login steps
- Open the official GOMO PH app or GOMO login page.
- Enter your registered GOMO mobile number.
- Type your 6-digit PIN.
- Select Log in.
- Open your account dashboard after successful verification.
If your compatible phone supports biometric authentication, you may also be able to use the available fingerprint or Face ID option.
Forgot your GOMO PIN?
If you cannot remember your PIN, avoid repeatedly entering random numbers. Select Forgot PIN? and follow the verification instructions provided by GOMO.
If your account is temporarily restricted after unsuccessful attempts, wait for the stated period and then use the official PIN recovery process.
Existing Gomo AT HOME Prepaid WiFi Users
If you already have a GOMO SIM installed in a compatible mobile device, make sure the SIM is active and your phone has a stable network connection. Open the official GOMO registration channel and enter the GOMO mobile number associated with your SIM. You may need to verify the number through an OTP before continuing with the registration process.
After selecting the option to register your SIM, complete the required identity-verification steps by providing your personal information, uploading a valid government-issued ID and completing the required selfie verification. Carefully review all the information before submitting your GOMO SIM Registration. Once the process is successfully completed, keep any confirmation or reference information provided for your records.
For users with a GOMO eSIM, the process can be slightly different because there is no physical SIM card to remove or insert. Make sure your smartphone supports eSIM, that the GOMO eSIM profile is properly installed and enabled, and that the device can receive the required OTP. Do not delete the GOMO eSIM profile unnecessarily, as reinstalling it may require additional activation or support from GOMO.
Gomo SIM Registration Verification Steps
Step 1: Enter Your Gomo Mobile Number
Enter your active GOMO mobile number in the registration form and make sure the number is correct before continuing.
Step 2: Receive the OTP
GOMO will send a One-Time PIN (OTP) to your mobile number for verification. Keep your SIM active so you can receive the code.
Step 3: Enter the OTP
Enter the OTP you received in the verification field. Make sure you use the latest code provided by GOMO.
Step 4: Provide Your Personal Details
Enter the required information, such as your full name, date of birth, nationality, address and other details requested on the registration form.
Step 5: Verify Your Identity
Upload your required valid ID and complete the selfie or other identity-verification process requested by GOMO. Make sure your documents and photo are clear.
Step 6: Review and Submit
Check all your information carefully before submitting the form. Once everything is correct, accept the required declarations and submit your GOMO SIM registration.
Registering a Gomo Mobile WiFi or MyFi SIM
GOMO also offers SIM-based services that may require registration under the applicable SIM Registration Act requirements. Depending on the service and device you use, the registration process may involve verifying the GOMO mobile number through an OTP and submitting the required subscriber information.
For GOMO Mobile WiFi or compatible devices, the OTP may be delivered through the device or its associated messaging system rather than directly to a regular phone inbox. If your device provides a management dashboard, connect to the device and check its SMS or message section to find the registration OTP. The exact menus and interface can differ between device models, so follow the instructions supplied with your particular GOMO device when accessing its settings and registration information.
If you are using a GOMO eSIM, make sure the eSIM profile is correctly installed and enabled on your compatible smartphone before starting the registration or verification process. Keep the device connected to a reliable internet connection and ensure that you can receive the required OTP during registration.
What About Gomo Postpaid SIM Registration?
GOMO SIM users who have Mobile WiFi or other compatible devices should complete the required SIM registration process by providing their GOMO mobile number and subscriber information. During verification, an OTP may be sent to the device or its associated messaging system, depending on how the service is set up. If your GOMO device has a management dashboard, check its SMS or message section for the verification code and follow the instructions provided for your specific device.
For customers using a GOMO eSIM, make sure the eSIM profile is properly installed and enabled on a compatible smartphone before completing registration. Keep your phone connected to a stable internet connection and ensure that the GOMO number can receive the required OTP. Since device settings and menus can vary, follow the instructions provided for your particular GOMO service or device to complete the registration smoothly.
Gomo SIM Registration for Foreign Nationals
Foreign nationals using a GOMO SIM in the Philippines are also covered by the country’s SIM registration requirements. However, the information and documents required may vary depending on the person’s status, purpose of stay and type of GOMO service being used.
Required Information and Documents
Foreign users should prepare the appropriate identification and supporting documents before starting the GOMO SIM Registration process. The exact requirements may depend on their individual circumstances and the documents accepted during registration.
Check the Official Requirements
Because requirements for foreign nationals can differ from those for Filipino citizens, it is important to review the latest official GOMO instructions before beginning registration. Preparing the correct documents in advance can help prevent delays, rejected submissions or verification problems.
If Online Registration Does Not Work
If the GOMO registration system does not accept your documents or you are unsure which identification document to use, avoid repeatedly submitting incorrect information. Instead, contact GOMO through its official support channels and ask for guidance on the appropriate registration procedure and documents required for your situation.
Registration for Companies and Organisations
For a company or organisation using a GOMO SIM, the registration details should represent the actual business or registered entity that owns or uses the number rather than being submitted as an ordinary personal SIM. The authorised representative may be required to provide the organisation’s official information, including its registered name and address, together with the representative’s personal details and a valid government-issued ID. Depending on the organisation and registration requirements, supporting documents may also be requested to establish that the business or entity is legitimate and that the person completing the registration is authorised to act on its behalf.
GOMO eSIM Not Working? Check These Settings
A GOMO eSIM does not require a physical SIM card, but your smartphone must support eSIM technology and the GOMO digital profile needs to be installed correctly. If your GOMO eSIM isn’t connecting to the network or mobile data isn’t working, check these settings before contacting GOMO support.
1. Confirm eSIM Compatibility
First, make sure your smartphone supports eSIM and that your specific device model or regional variant is compatible with the required cellular network configuration.
2. Check the GOMO eSIM Profile
Go to your phone’s SIM, Mobile Network, or Cellular settings and look for the GOMO eSIM. Make sure the profile is installed properly and that the eSIM line is switched on.
3. Set GOMO as Your Mobile Data Line
If you have another physical SIM or eSIM active on your phone, check which line is selected for mobile data. Choose GOMO as the mobile-data line if you want your internet connection to use the GOMO eSIM.
4. Don’t Delete the eSIM Profile Unnecessarily
Avoid deleting the GOMO eSIM profile unless you’re specifically instructed to do so. Removing it may mean that you need additional installation details or assistance from GOMO to set it up again.
If your GOMO eSIM still isn’t connecting after checking these settings, use GOMO’s official support channels for further assistance.
How to Keep Your Gomo Registration Details Safe
Protecting your personal information is an important part of GOMO SIM Registration because the process may involve your mobile number, government-issued ID, selfie and OTP. Always use official GOMO registration channels and avoid giving your personal information to people who claim they can register your SIM on your behalf.
How to Know if Your Gomo SIM Is Registered
After you submit your GOMO SIM Registration, wait for the registration system to process and verify the information you provided. Once the registration has been successfully completed, you should receive the appropriate confirmation or notification through the available GOMO channel. Keep the mobile number active and check your messages or registration account for updates.
If you do not receive confirmation immediately, do not assume that your GOMO SIM Registration has failed. First, review the information you submitted and make sure your personal details and identification information were correct. If a registration reference number or confirmation record was provided, save it safely because it can help you keep proof of your registration and may be useful when contacting GOMO support about a registration concern.
What If You Don’t Receive the Gomo OTP?
The OTP is an essential part of Globe SIM Registration because it confirms that you have access to the mobile number being registered. If the code doesn’t arrive, follow these three steps before trying again.
Step 1: Check Your Network and SMS
Make sure your Globe SIM has adequate network coverage and can receive text messages. If the signal is weak, move to an area with better reception and try again.
Step 2: Check GomoOne and Request a New OTP
If you’re registering through GlobeOne, check that your internet connection is working and that the app is updated to the latest version. When the option is available, request another OTP and enter the new code.
Step 3: Wait and Try Again Later
Avoid requesting multiple OTPs repeatedly within a short period. If you still don’t receive the code after several attempts, wait for some time before trying again or contact Globe through its official support channels.
Common OTP Troubleshooting Checklist
| Problem | What to Check |
|---|---|
| OTP not arriving | Check signal and SMS reception |
| Wrong number | Confirm the mobile number entered |
| OTP expired | Request a new OTP |
| App error | Update and restart GomoOne |
| Weak internet | Switch to a more stable connection |
| Repeated failed attempts | Stop and try again later |
Never share your OTP with another person. A legitimate registration process should not require you to disclose your one-time verification code to an unknown caller or message sender.
GOMO SIM Registration Image Upload Problems
During GOMO SIM Registration, your government-issued ID must be clear and readable so your identity can be verified properly. If the registration system rejects your ID image, check the file quality, format and size before uploading it again.
Try these practical fixes:
Do not edit or alter the information on your government ID to make it pass the verification system. If your document continues to be rejected, try another valid identification document accepted for GOMO SIM Registration or contact GOMO through an official support channel for assistance.
Is Gomo SIM Registration Free?
Yes. Globe states that its online SIM registration service is free and zero-rated, meaning customers do not need to pay a registration charge through the official online process.
Be careful if a website, social media account or individual asks you to pay a separate fee simply to register your Globe SIM online. Use the official Globe portal or GlobeOne app instead.
How to Keep Your Gomo sim Registration Details Safe
Your GOMO SIM Registration information contains personal data, so it is important to keep it private and secure. Always use official GOMO or authorised registration channels when submitting your mobile number, government ID, selfie and other personal details. Never send your ID photo, selfie or OTP to strangers through Facebook, Messenger, WhatsApp or other messaging apps, even if they claim they can help you complete your registration. If you need assistance with your GOMO SIM, use an official GOMO support channel instead of relying on unknown individuals.
Security Tips for Gomo SIM Registration
Frequently Asked Questions About Gomo SIM Registration
Conclusion
Completing your GOMO SIM Registration is essential to keep your GOMO mobile number active and continue enjoying calls, texts, and mobile data services in the Philippines. The registration process is straightforward when you have your valid government-issued ID, personal information, and mobile device ready before starting. You can complete the registration through the official GOMO app or authorized registration platform, verify your mobile number using the OTP, upload the required identification documents, complete the selfie verification process, and save your reference number after successfully submitting the application.
Before submitting, carefully review all information to ensure accuracy and avoid delays or registration issues. Always use official GOMO channels and never share your OTP, ID images, or personal details with unauthorized individuals. If you encounter any difficulties during registration, you can contact GOMO customer support for assistance. By completing your GOMO SIM Registration correctly, you can comply with Philippine SIM registration requirements and continue using your GOMO SIM securely and without interruption.